Did you know … how to add images to your email communications?
Have you ever wanted to spice up your email communications with some additional images—perhaps of your smiling big-name Host or a previous big winner of your show? Whatever your need, adding images to your email templates is simple, and this handy guide will help you!
First, it’s important to understand that when adding an image to an email, the image file (jpeg, gif or whatever) needs to be uploaded somewhere accessible on the internet. This is so that your email file size doesn’t become too big for your Applicants’ inboxes and that email programs (Google, Outlook, Yahoo, etc.) can display the image correctly when your Applicants view the email. Otherwise, your images might display a broken image—and ruin the look you’re going for.
So how do you do this? If you’re a Cast It Reach Builder user, you can simply upload the image as a Resource in your campaign. To do this:
- Go to Builder
- Click on Resources and click
 to add a new Resource
 - Give your Resource a name
- Upload your image
- Save and Publish your changes
- Your new resource will look a bit like this:
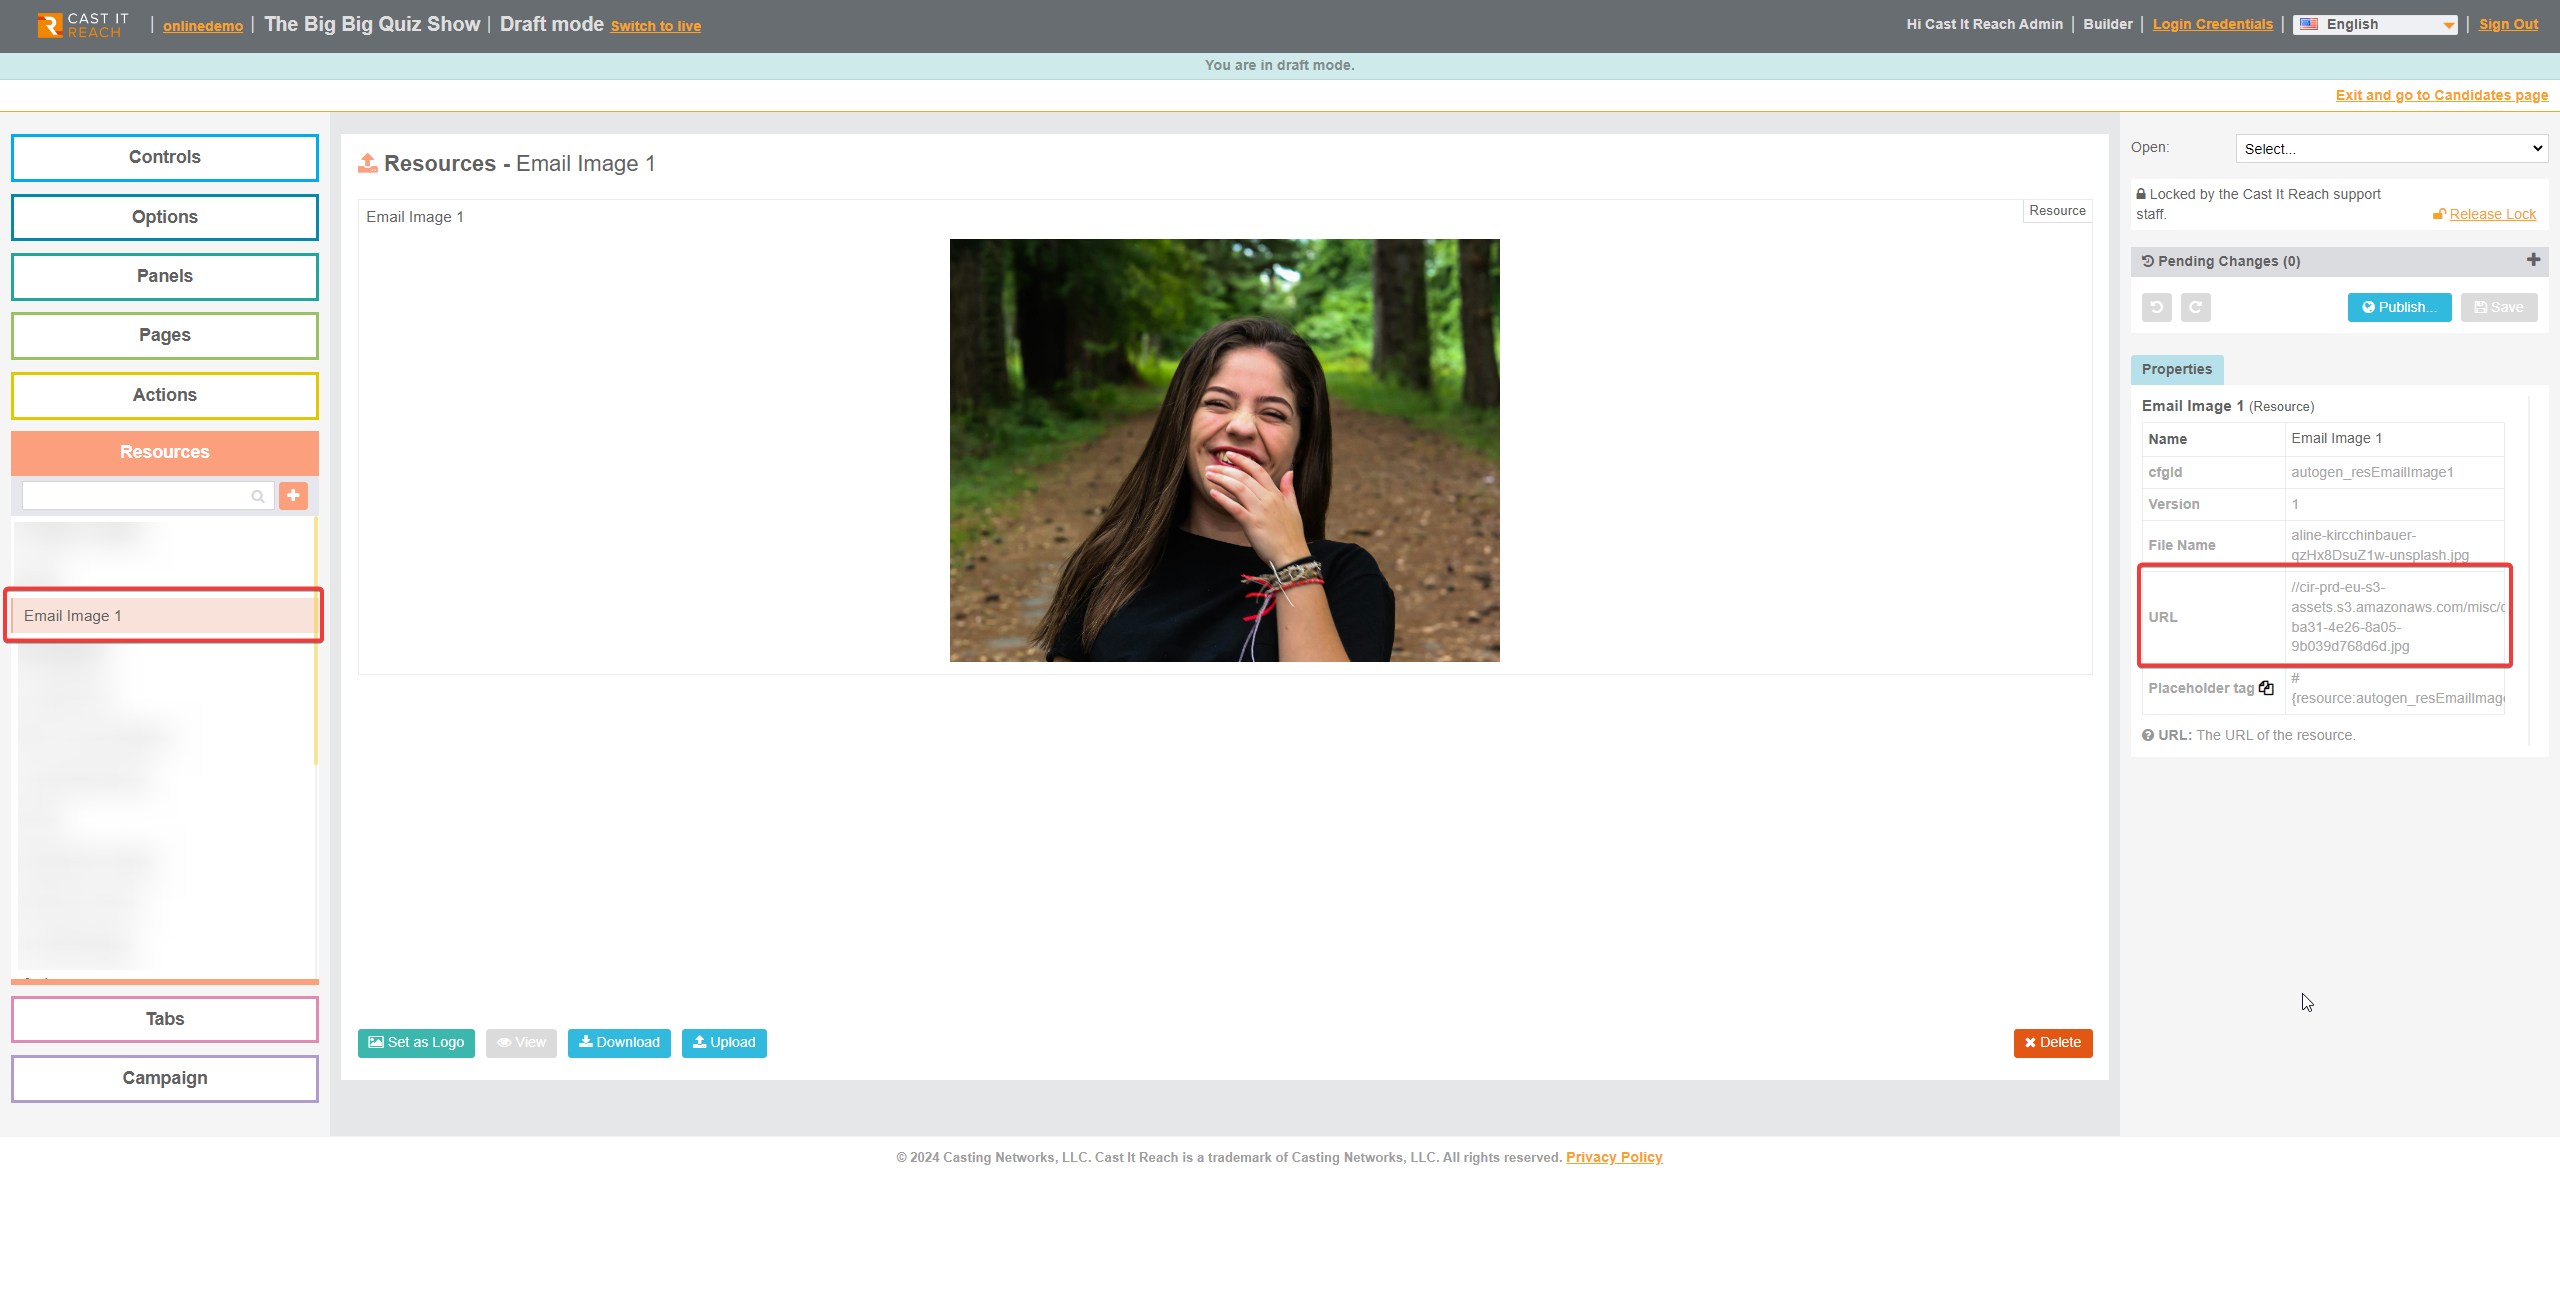
- Next, select the image’s URL in the Properties section and paste it into a browser address bar. You’ll see the image load in your browser window.
- Copy the slightly updated URL from the browser address bar. It will look something like this:

Note: If you’re not a Builder user, you can send your image to support@castitreach.com, and we will upload it for you and send you the URL.
Next, Add Your Image to Your Email Template
- Create or select the email template you want to add your image to
- Place your cursor in the template’s editable section where you want your image to appear.
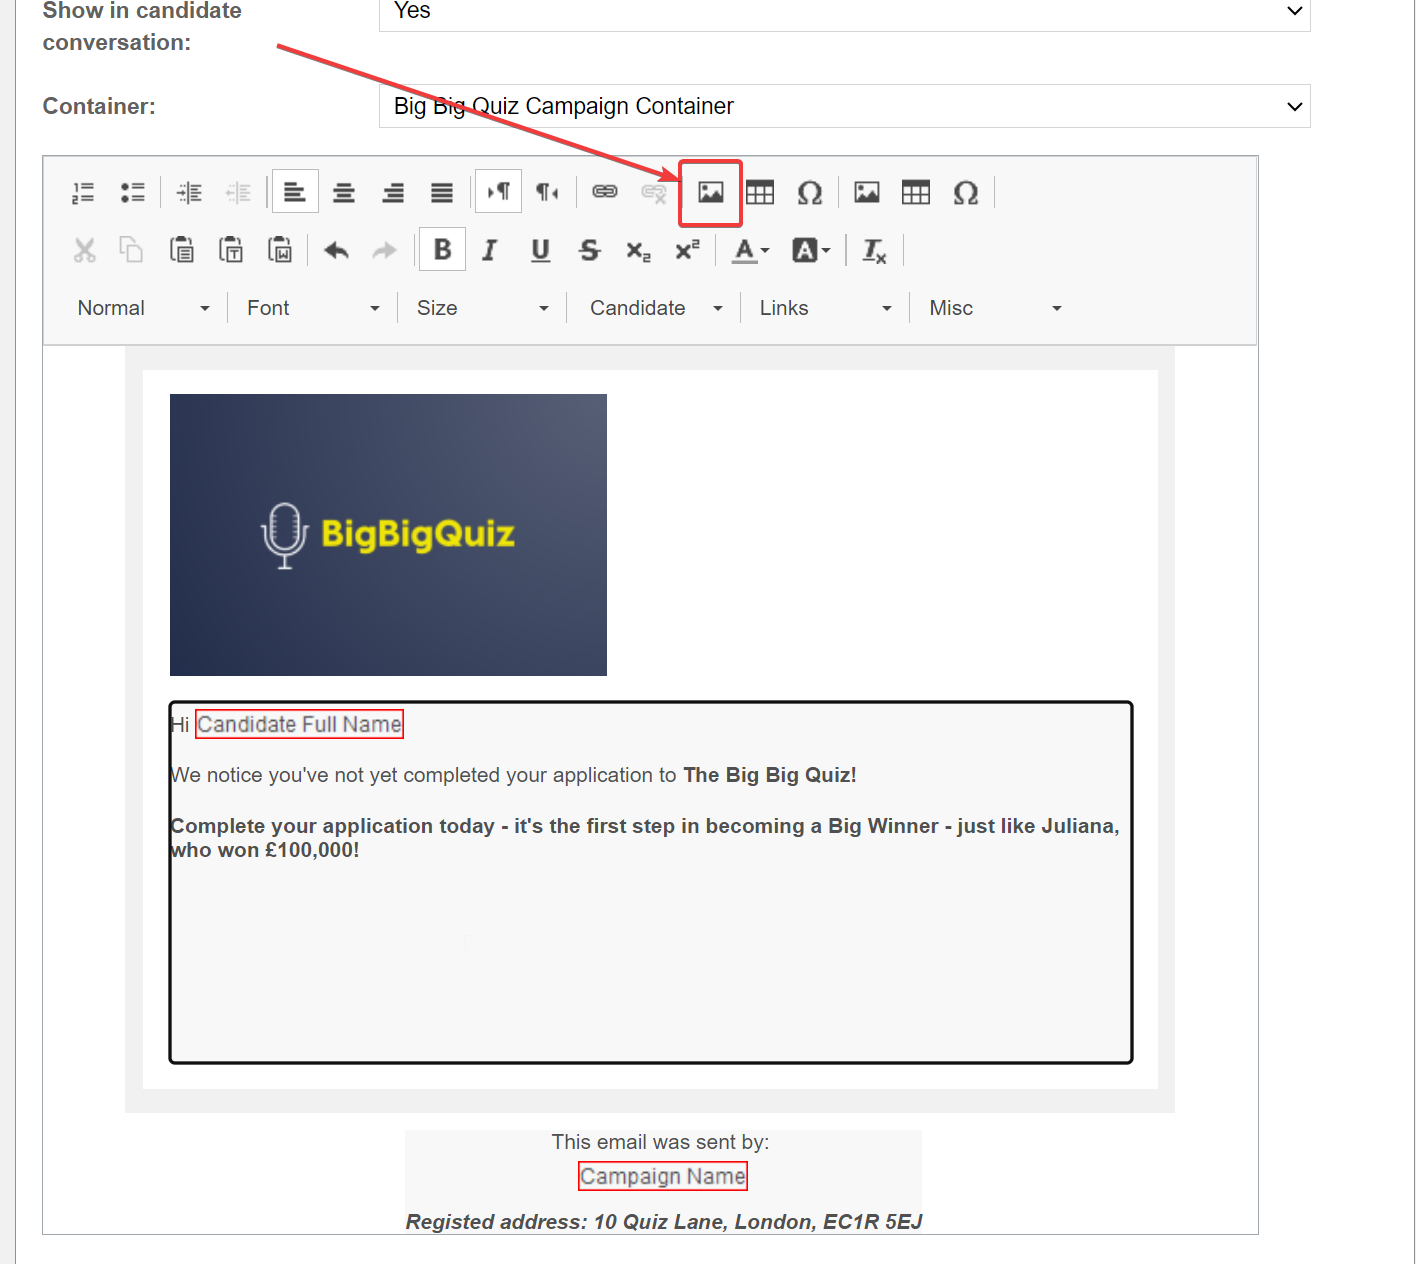
- Click on the Image icon
 at the top of the Template Editor:
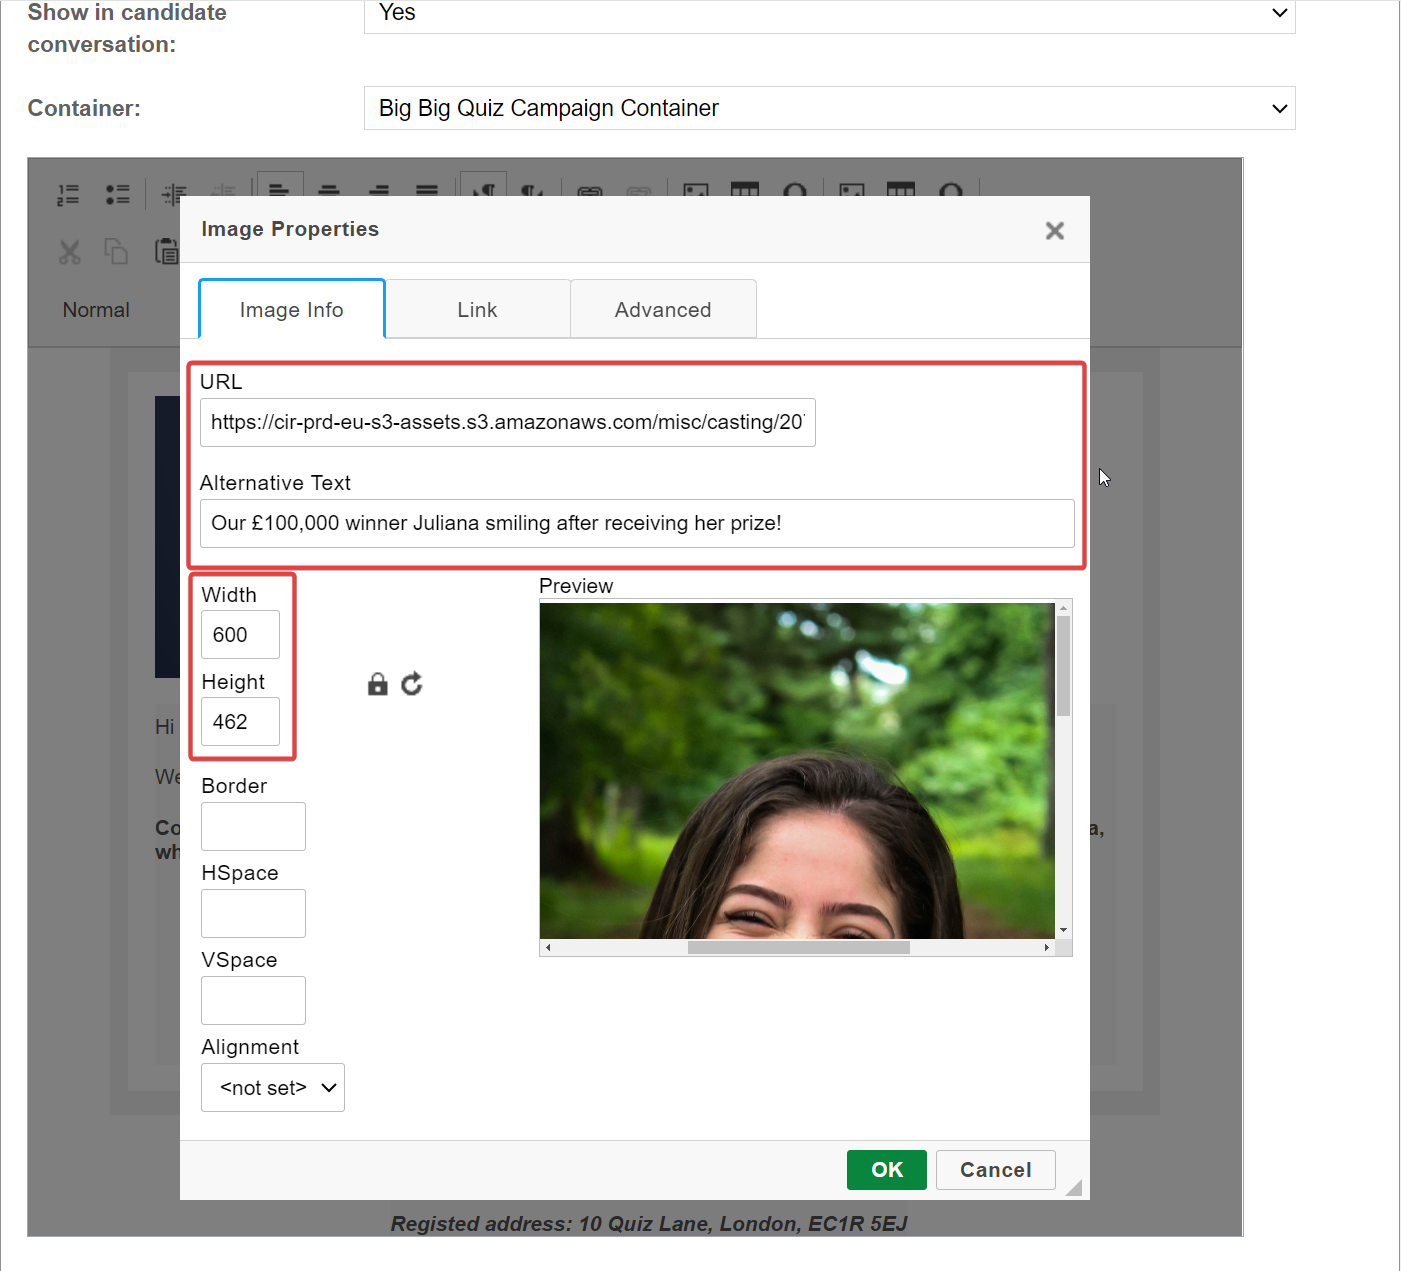
- Paste the Image URL you copied into the pop-up box’s URL field.
- Important: Add an ALT TEXT for accessibility reasons. This should describe the image accurately for users who may use a screen reader and is best practice.
- Set the image width to a maximum of 600px (our default template width). The image will resize in the correct proportions.
- Click OK.
- If you want to make any adjustments to the image, such as making it a bit smaller or changing the Alt Text, simply double-click the image and adjust as necessary.
- Once happy, make sure you save and continue editing your email template.
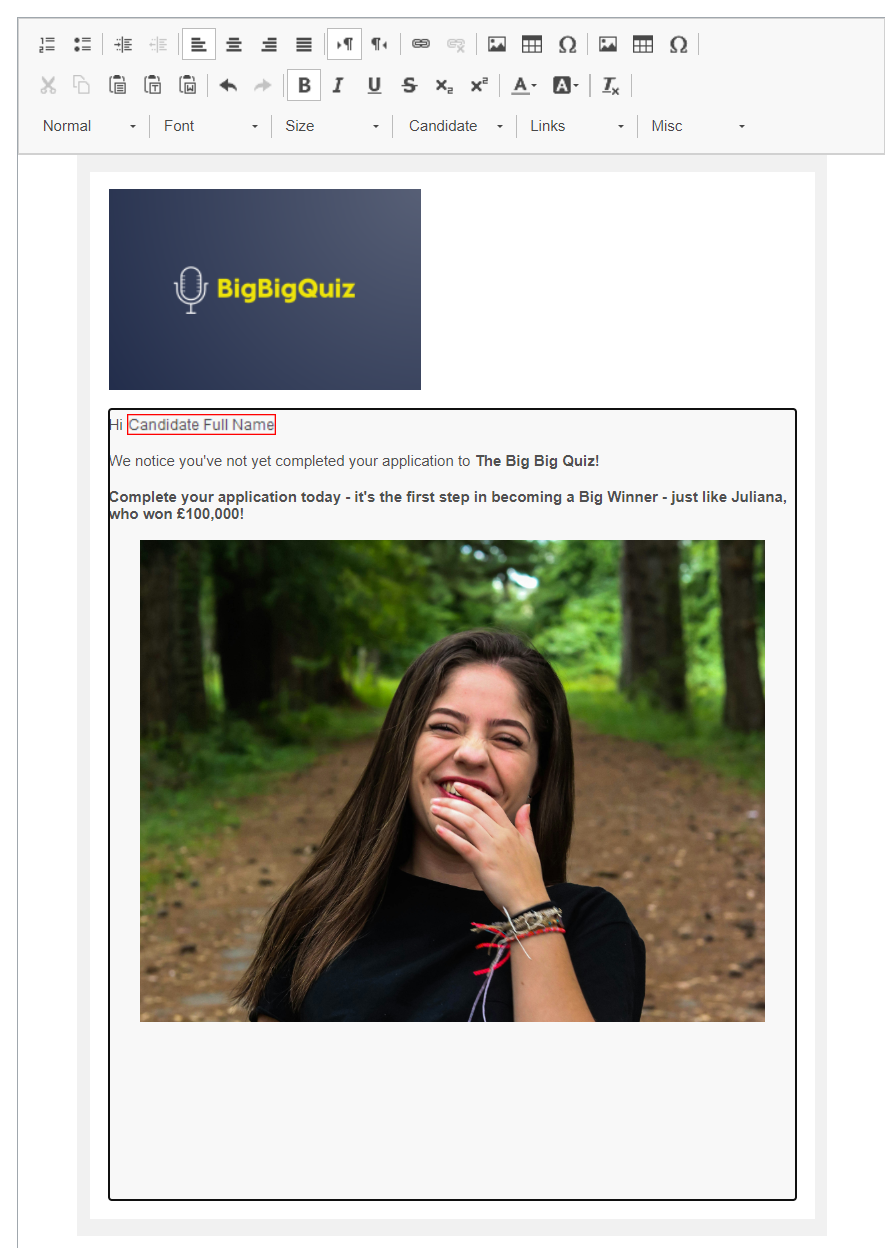
Test your email using the ‘Test Template’ function at the bottom of the Email Template.
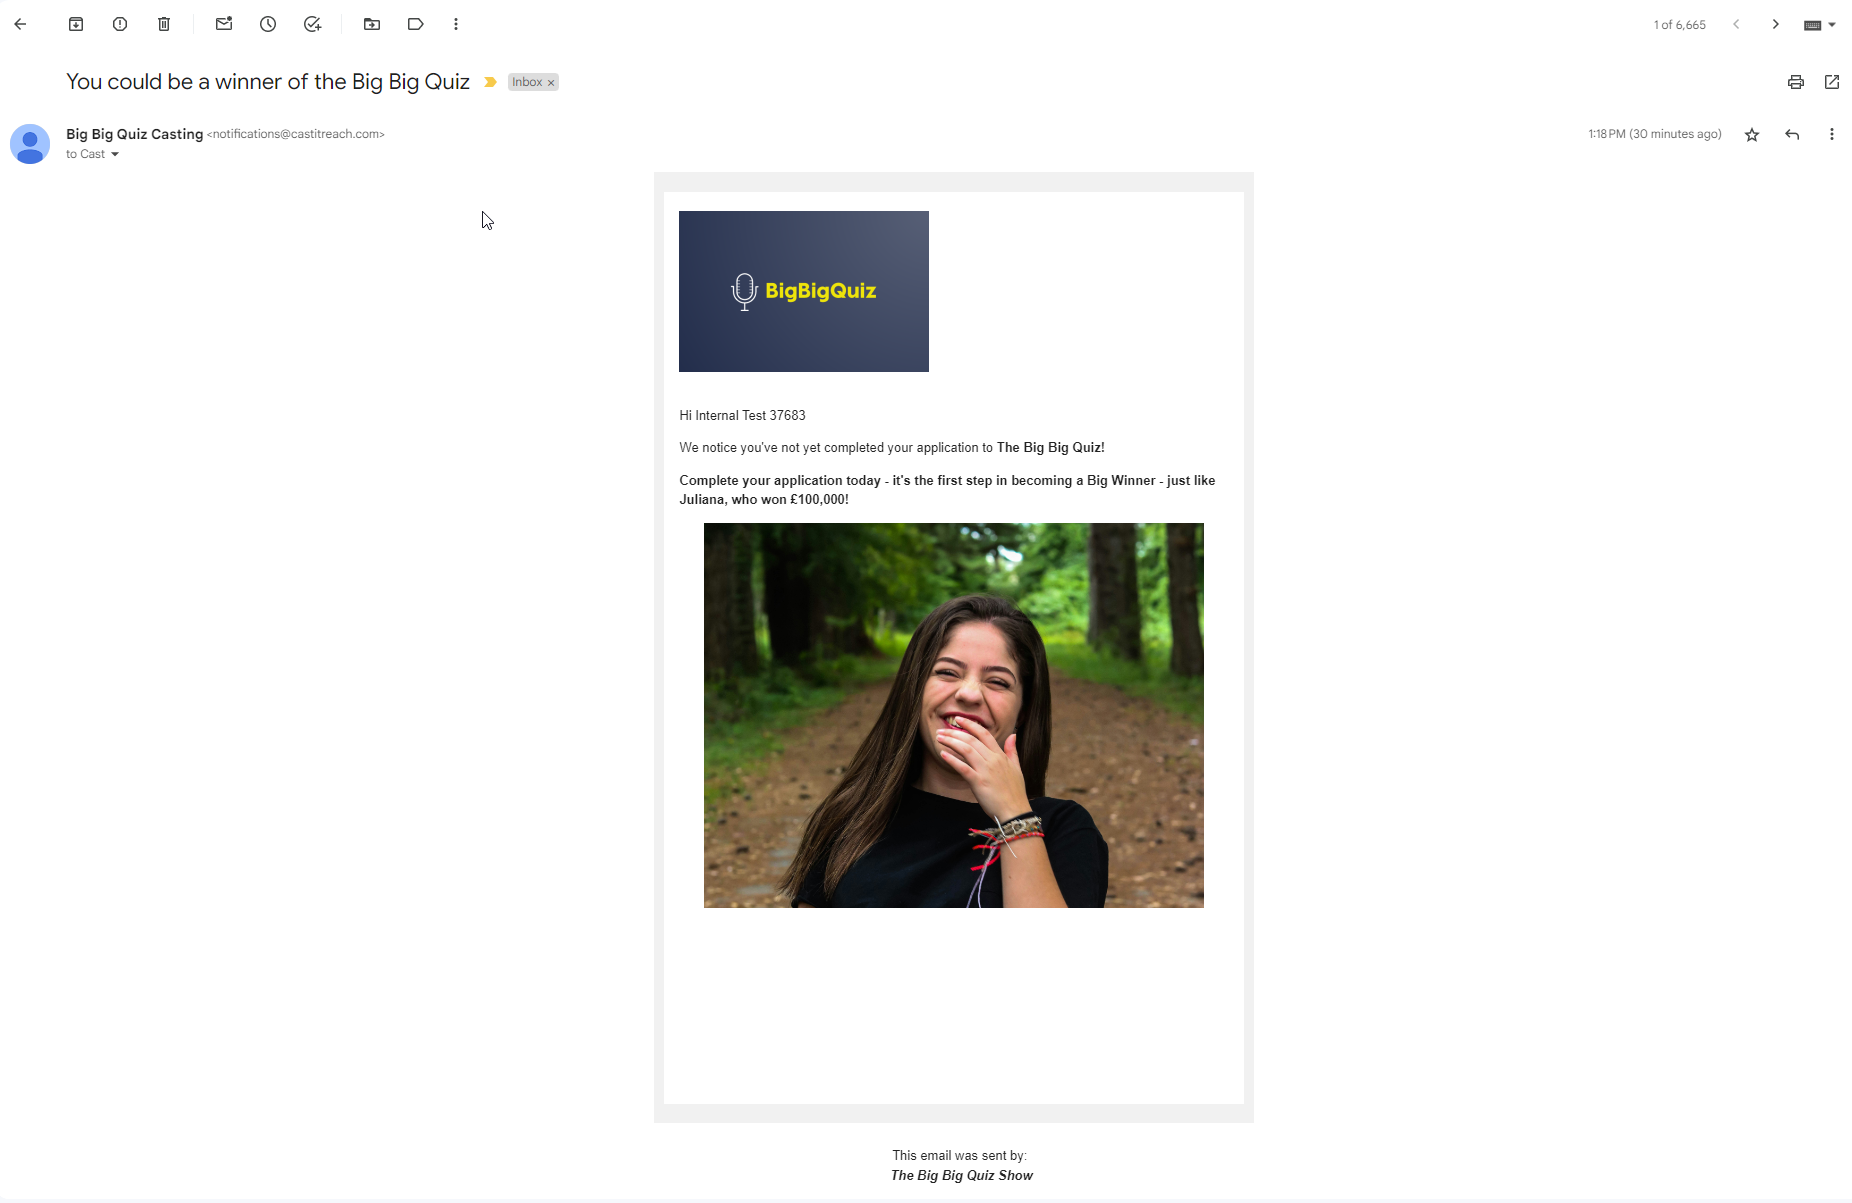
The email you receive should include the image:
Note: You should never include ALL of the information in your email in an image, as this could cause issues for people with certain accessibility requirements. Instead, use text where text would be expected.
If you need assistance, please email support@castittreach.com, who will gladly assist you!
Cast It Reach is a Talent Systems company.
Visit talentsystems.com to learn more.


